

Resurrecting the Battle Standard
Why cleaning your vintage Vestax PMC-05PROIII is critical for performance preservation. A comprehensive log.
The Vestax PMC-05 series isn't just a piece of audio equipment; it is the Excalibur of the golden era of turntablism. From the Invisibl Skratch Piklz to the Beat Junkies, this mixer defined the sound of a generation. But time is the enemy of analog gear.
Why Cleaning Vestax Mixers is Non-Negotiable
Over 15+ years, a mixer accumulates a "sludge" comprised of dust, dead skin cells, smoke residue, and dried-up factory lubricant. This doesn't just look bad; it destroys components.
- >> Carbon Track Degradation: Dirt acts like sandpaper on the conductive carbon tracks of your faders. If left uncleaned, it will permanently scratch the track, causing "dead spots" where audio cuts out.
- >> Signal Bleed: Conductive debris can bridge connections that shouldn't be bridged, leading to audio "bleeding" from one channel to another even when the fader is closed.
- >> High Noise Floor: Oxidized inputs and outputs introduce hum, hiss, and static, destroying the fidelity of your vinyl.
THE RESTORATION LOG

01 // The Assessment
The Vestax PMC-05PROIII with the hamster switch was the preferred weapon of choice for DJ QBert and the Invisibl Skratch Piklz. This specific unit has seen over 15 years of heavy use without a single service.
Initially, I noticed serious slide resistance—the "butter" feel was gone, replaced by a gritty friction. More concerning was a persistent 60-cycle hum and static crackle when touching the faceplate. This indicates grounding issues caused by oxidation on the internal contacts. It was time to open it up before the damage became permanent.
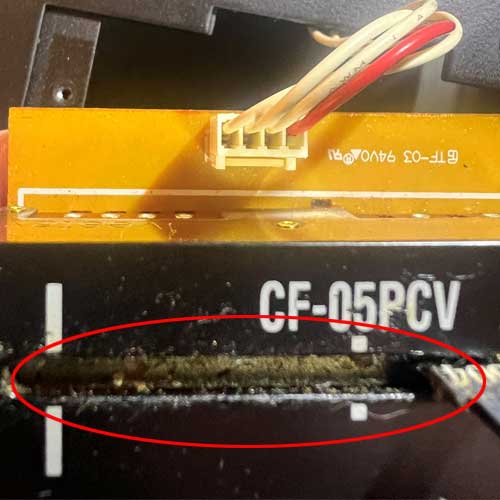
02 // The Crossfader Grime
You can visually see the horror show inside the crossfader. That black sludge is years of caked-up dirt, dust, and dried lubricant.
For a scratch DJ, the crossfader is the engine. When debris builds up on the rails, it increases "cut lag" and friction, making complex techniques like crabs or flares impossible. I considered replacing the CF-PCV fader entirely, but genuine Vestax parts are becoming rare and expensive. I decided to attempt a deep clean to save the original component. Cleaning the guide rails is crucial to restoring that frictionless glide.
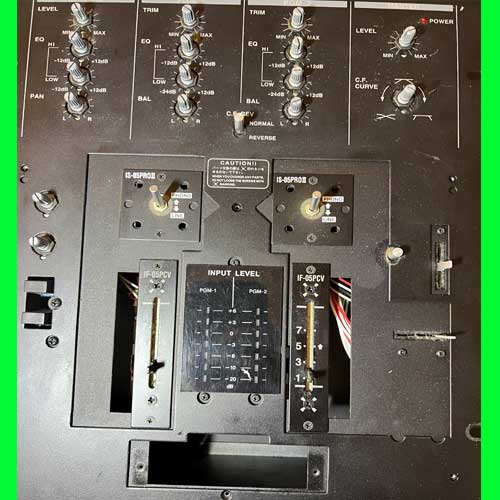
03 // The Teardown
The process began by removing every fader cap, EQ knob, and the faceplate screws. To properly clean a mixer, you cannot just spray cleaner from the outside; you must strip it down to the chassis.
Vestax mixers are built like tanks, but the screws can be easily stripped if you aren't careful. Organizing the screws is vital as the faceplate screws differ from the internal PCB mounting screws. This stage exposes the accumulation of dust bunnies that have been shorting out connections for the last decade.

04 // Input Fader Analysis
The upfaders (volume slides) were in equally bad shape. These controls are essential for smooth mixing and fading.
Unlike the crossfader, which is designed for rapid movement, these provide resistance. However, the dirt here was causing "jumps" in volume—where the audio would suddenly spike or cut out while sliding. They definitely needed a deep flush and a re-grease to restore linear resistance without the grit.
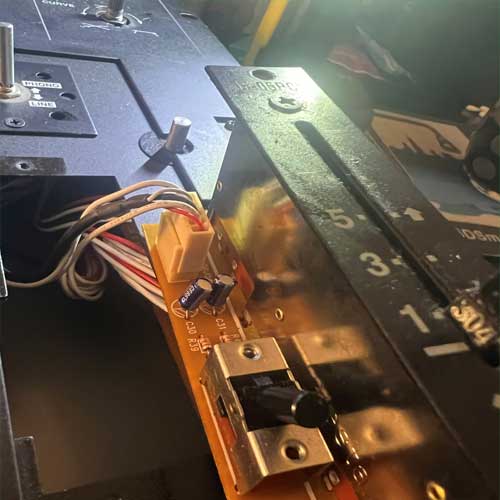
05 // Chassis Separation
Taking apart the mixer further, separating the top PCB layer from the power supply and I/O board at the bottom. This grants access to the grounding points which often cause the "hum."

06 // Extraction
Removing each slide control individually. This is critical because you want to clean the component away from the main motherboard to prevent runoff from damaging other circuits.

07 // The Chemical Bath
The internal electrical controls were treated with Deoxit D5. This is the magic wand of electronics repair.
Deoxit D5 is perfect for this because it doesn't just clean; it chemically dissolves the oxidation on metal surfaces (the "rust" of electronics) and leaves a microscopic protective layer. I sprayed this into the potentiometers (EQ knobs) and the toggle switches. By working the switches back and forth while wet, the D5 breaks up carbon buildup, instantly curing the crackling sounds.

08 // Meticulous Detail
The mixer is now fully disassembled. Every piece, from the metal faceplate to the plastic knobs, was cleaned meticulously.
It is crucial to clean every item individually. Dust hiding under a knob can easily fall right back into a freshly cleaned fader the moment you turn the mixer upside down. I washed the faceplate with warm soapy water (drying thoroughly!) to remove oils and grime, making the mixer look factory fresh.
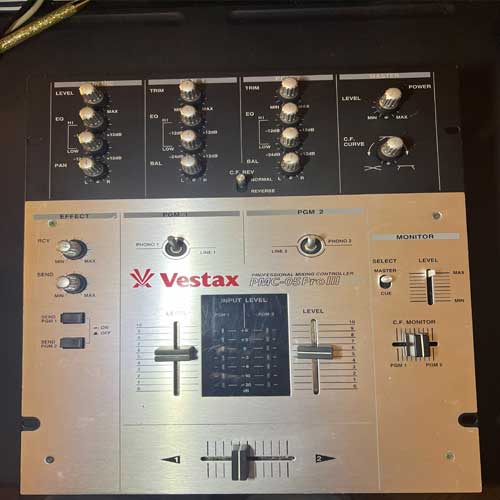
09 // The Resurrection
The unit was fully re-greased, reassembled, and tested. It functions almost like new.
The difference is night and day. The audio hum is completely gone—absolute silence when the faders are closed. The crossfader flies across the rails with zero resistance, allowing for lightning-fast cuts, while the upfaders have that smooth, hydraulic resistance they had in 2005. This maintenance has likely added another 10 years to the mixer's lifespan.
The Toolkit

You cannot achieve professional results with household cleaners. WD-40 should never touch a mixer (it attracts dust!). Here are the specific chemicals used:
Deoxit D5 Contact Cleaner
The industry standard. Used to clean the internal electrical components (pots, switches, PCB contacts). It flushes out dirt and dissolves oxidation to restore electrical continuity.
ZDBB Dielectric Grease
Essential for the slide rails. After cleaning with D5, the metal is dry. ZDBB grease provides the necessary lubrication for smooth mechanical movement and protects the metal from future corrosion.